The Makerspace with Elias: Foxhole Radio
May 4, 2018
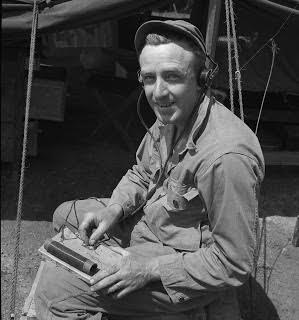
The foxhole radio was first widely used during the Second World War. It was a very simple device used to listen to AM radio signals. Its popularity was mainly due to the fact that it did not require any power source to operate. Through scrounging up materials, prisoners of war in Germany could build their own and listen to Allied broadcasts to stay updated on the current events of the war. Something simple enough as to be built within a prison should be an easy project for anyone with amateur tools and household items.

Now, there are almost limitless ways to build a foxhole radio, so I will only cover one. The first thing you will need is a board or something to base all your components on. It can be built without this but a base will make everything much better and stable.
Coil:
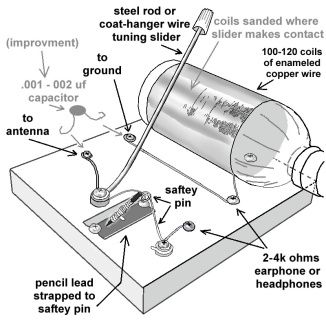
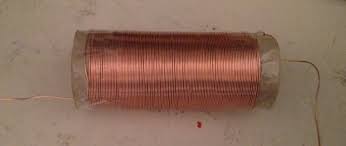
For the coil you will need something to wrap wire around. Something about the length and diameter of a toilet paper tube works very well, just make sure whatever you choose is not conductive. Next wrap magnet wire around your tube. To hold it in place you can poke a hole in the cardboard tube and push one end through, or you can wrap it and tape it later. The wire used can range from very thin to about the thickness of a staple. Plan to wrap the tube about 120 times and push the wires together so that they are all touching.
Detector:
The detector is made from a single razor blade. It can be either bought blued or a normal razor blade can be blued by heating it up with a propane torch and the oxidation wiped off. Rusting a razor blade also works, but this takes more time. If you would like to do this, use a salt water solution.
Capacitor:
To make the capacitor, take a dull pencil, break it off close to the end, and insert a safety into the lead.
Headphones:
Can be one or two, just make sure that you are able to separate out the wires in it to use one for the positive connection and one for ground.
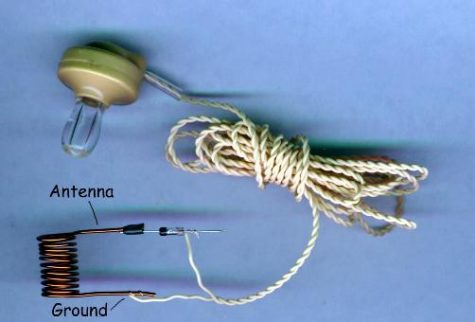
Antenna:
A long wire works well for this to pick up a signal. A good idea is to use an old ethernet cable. Simply strip it and take out one of the wires from inside. The longer the wire is that you use, the better!

Ground wire:
To ground everything you can either take a coat hanger and stick it into the dirt, then attach your ground wire, or connect your wire to a large metal object like a radiator.
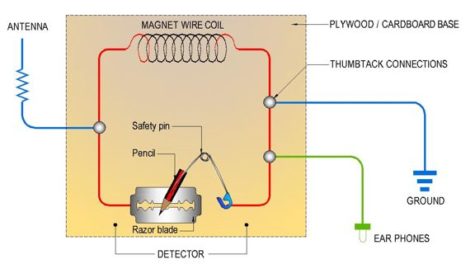
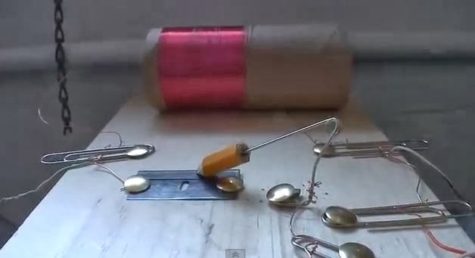
Now that you’ve got all your components, it’s time to put them together. The diagram below is how everything should be connected. Use metal screws to attach two wires together and drill into your base board you started with.